Save-My-World
Hope you enjoyed Part 1 of Save My World. This is Part 2 of a 3 Part series for Save My World.
In Part 1, I give an overview into the application.
In Part 2, I provide more indepth explanation into the entire development process - Problem Sourcing, Design Thinking and Prototyping, Rapid Protyping with CICD, and everything else.
In Part 3, I talk about the bottlenecks of the projects and the workarounds that we used to resolve them.
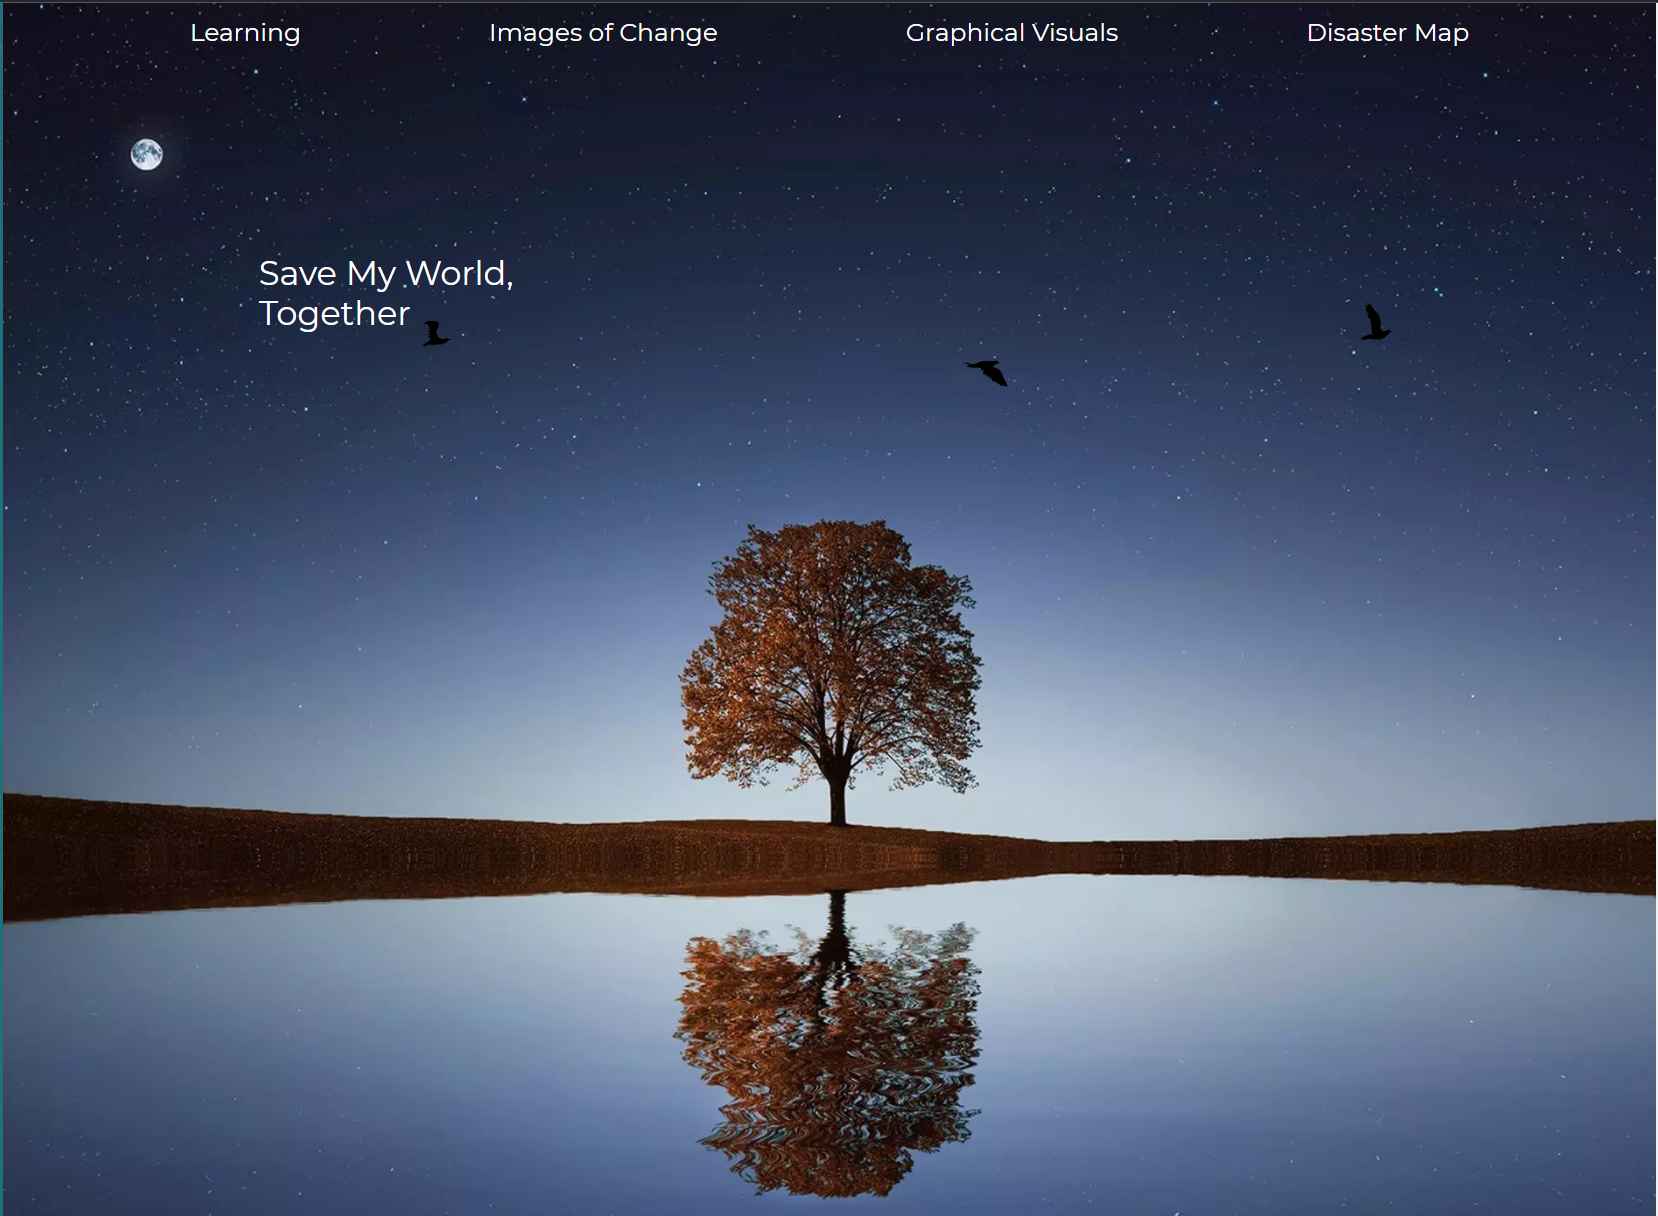
Save My World’s Landing Page
Application Development Lifecycle
We took an iterative, modified SCRUM approach while developing the entire app. The app was built in about 4 - 7 weeks, inclusive of preparation and brainstorming. Initially, we started to source for problems that would pose a challenge. Then, we split the work up to where some would work on Figma Prototyping, while others would work on the tech stack and code top-level architecture design. Afterward, we jumped straight into building the app due to the lack of time.
I proposed a modified SCRUM approach, where we would meet every 1-2 days and have a short 30mins TODO, End-Of-Day, and bottleneck updates. The meetings solved as many bottlenecks as possible and helped propel the team forward. We did not have much formal tracking of SCRUM Artefacts, but we ensured that meeting minutes were properly documented. We wanted to spend the least amount of time while producing as much quality work as possible.
Initial Ideation
We set up a collaborative Master Google Document, where we would all dump our work and ideas. It allowed for transparency and prevented any silos. The Problems we wanted to solve had to fulfill 3 key Criteria
- It must be challenging enough for the course
- It must be a Problem that can make use of multiple APIs (online APIs as we did not need to create our own)
- The Problem had to be interesting enough such that we wouldn’t get bored and at the same time not too difficult and within the team’s capabilities.
Keeping in mind the above, we brainstormed over 10-20 Problems, ranging from Virtual Reality to Food Wastage. In the end, we narrowed it down into (1) Climate Change and (2) Food Shortages around the world. We proceeded to book a consultation with our Professor and settled on Climate Change.
Problem Statement and Solution Conceptualization
After narrowing down our category, we wanted to scope and polish our Problem Statement. We wanted to ensure that our Problem Statement reflected our entire project focus, while not being too ambitious. After hours of discussion, we decided to scope the Problem into something applicable everywhere. We narrowed down our target audience to “Climate Change Detractors” and came out with our final Problem Statement:
Climate change is increasingly evident, yet there are still numerous climate change skeptics everywhere. This impedes global progress on tackling climate change because they undermine the support, commitment, and funding for climate solutions through government lobbying and influencing other people to believe in their anti-climate ideologies. How can we convert climate change skeptics into evangelists amidst the vast sea of misinformation, such that there will be more supporters of climate change?
From this, we also came up with the specific objectives of our project:
- Increase awareness for climate change
- Debunk false climate change claims with proper proof (e.g. articles/statistics)
- Provide clear climate change information in easily digestible bits
- Show how underfunded climate solutions are
- Provide future trends and expectations on how the world is currently headed
These objectives were based upon the synthesized characteristics (from online sources) of our target audience. We ensured that our project objectives were in line with our target audience and Problem Statement.
Brainstorming of Solutions for the Application using FIGJAM Whiteboards
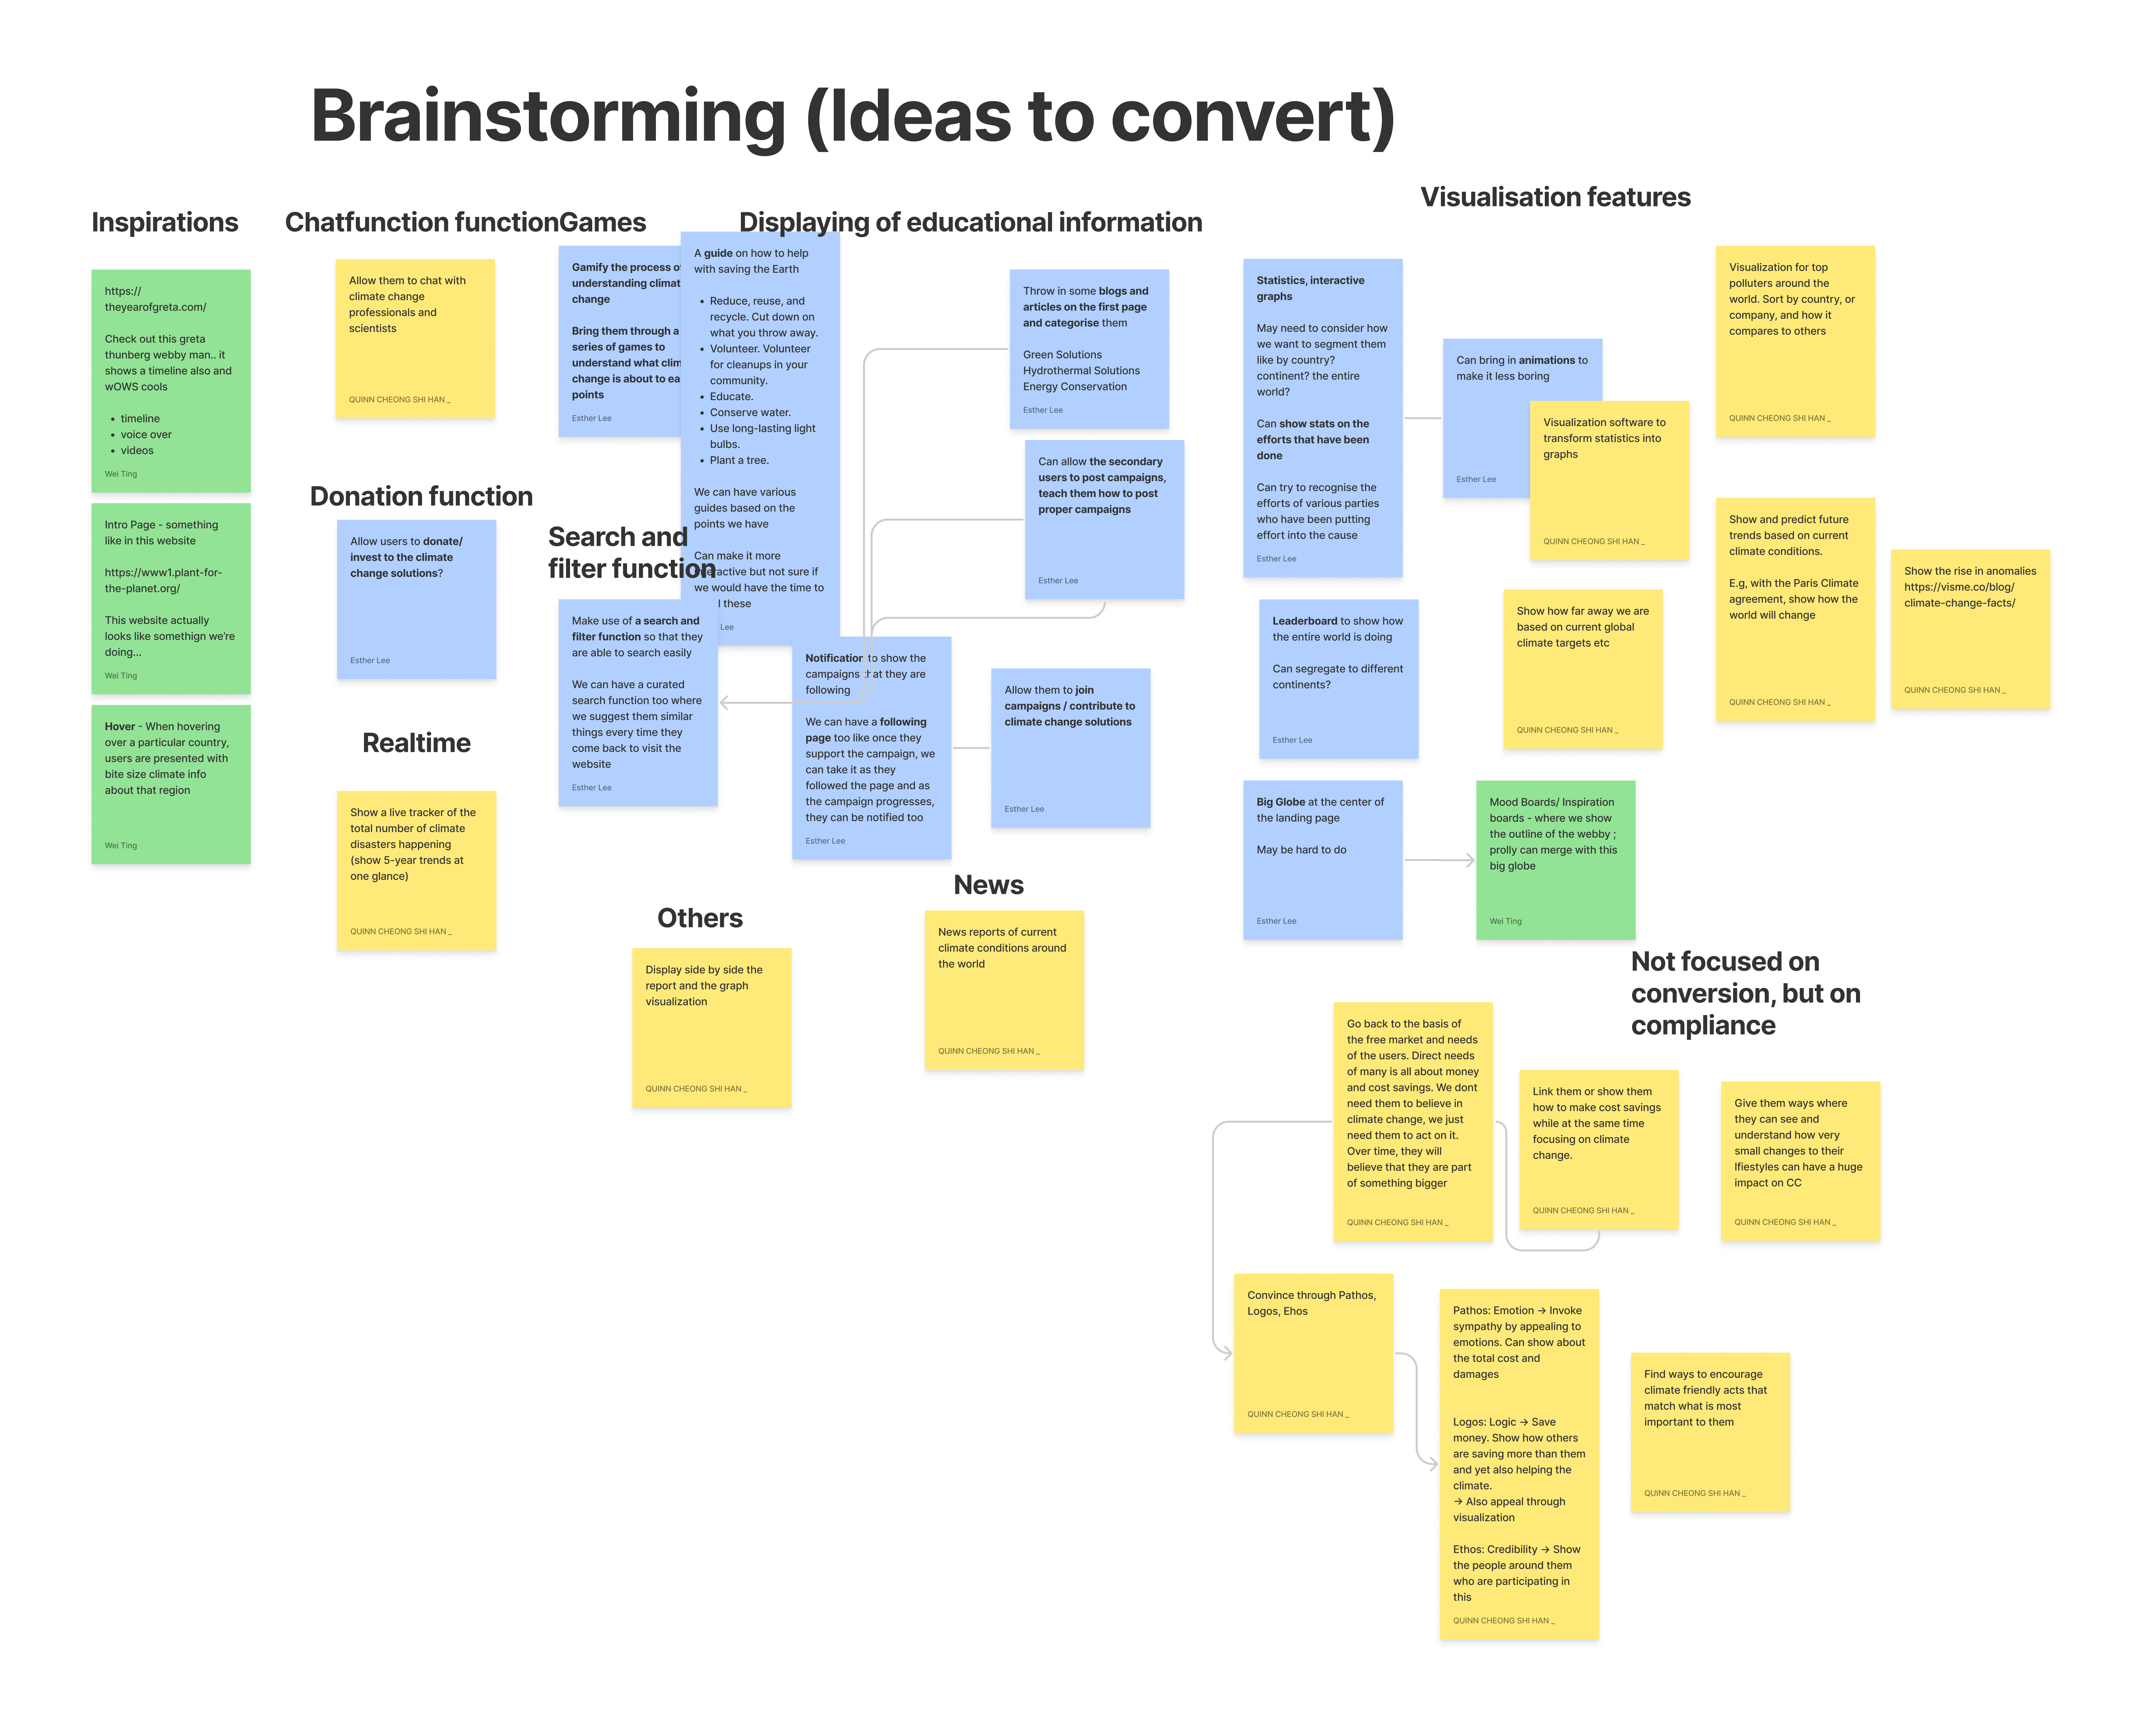
Prototyping on Figma
We proceeded to introduce preliminary mockups on FIGJAM Whiteboards for the targeted solutions. The mockups were done as quickly as possible so that the team could get a gauge of the entire layout of the Website before we implemented the second round of more thorough mockups using full-fledged Figma Design Files.
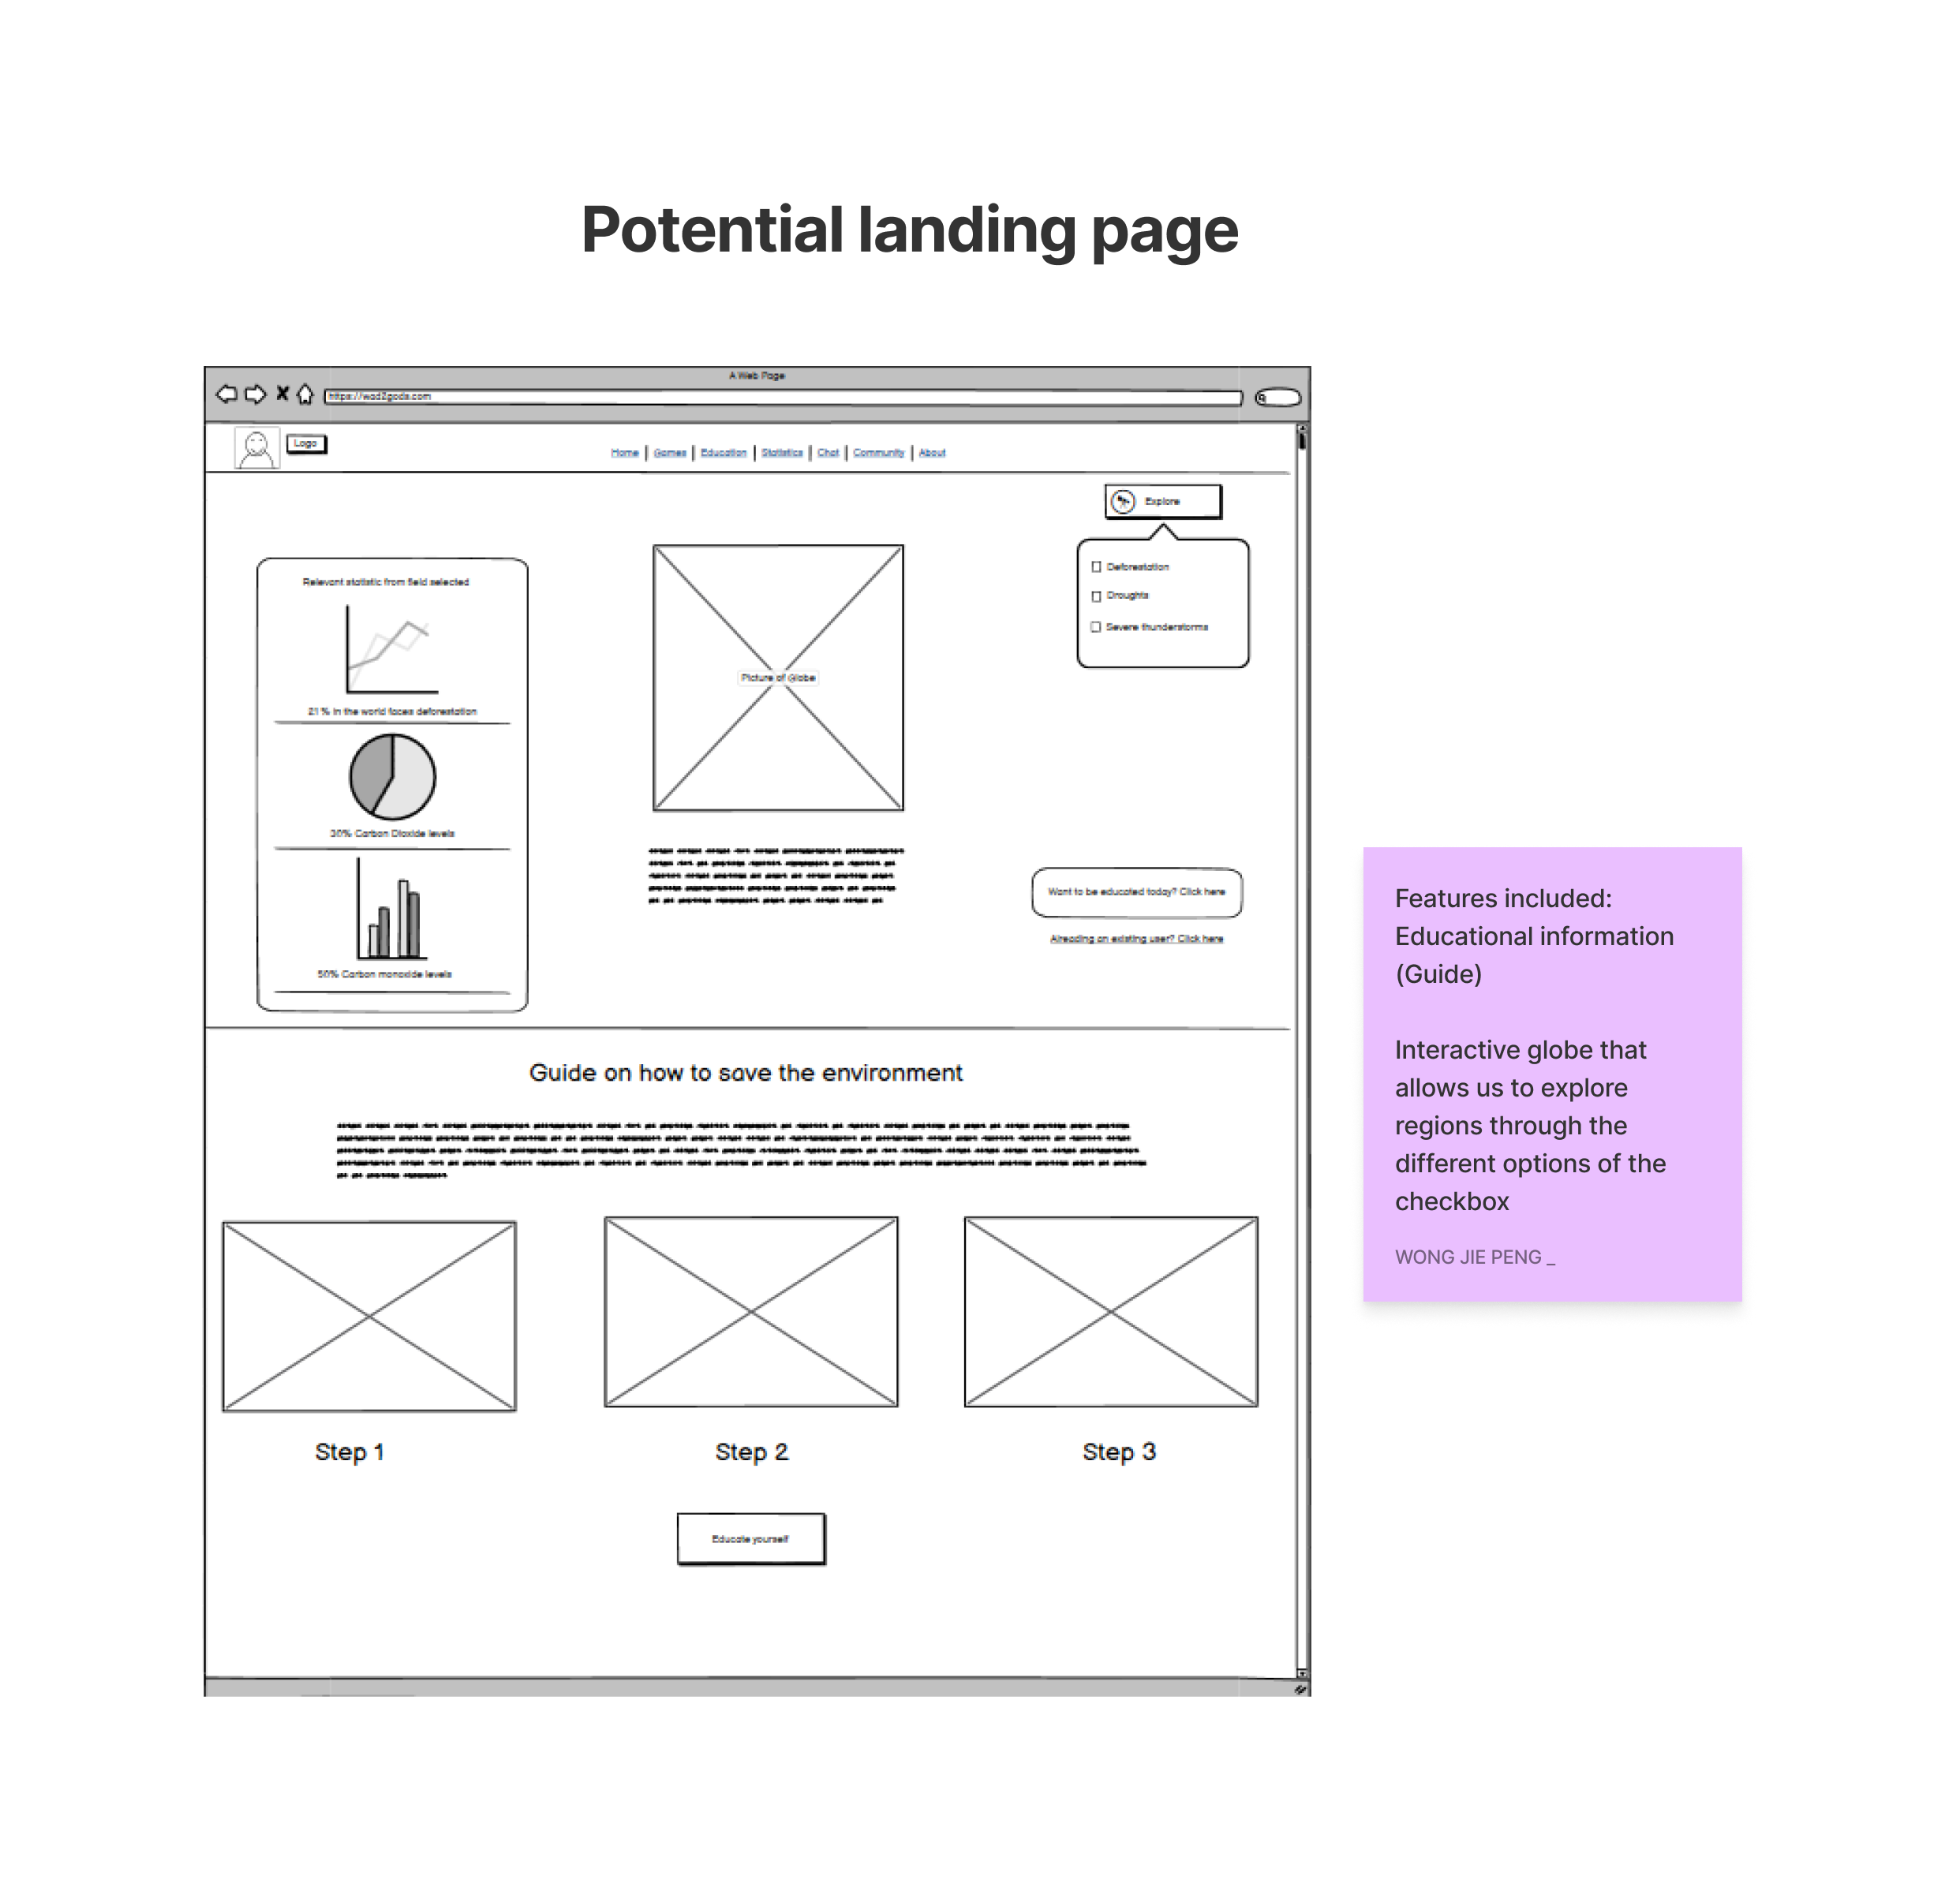
Mockup of the Landing Page on FIGJAM Whiteboards
Mockup of the Community Page on FIGJAM Whiteboards

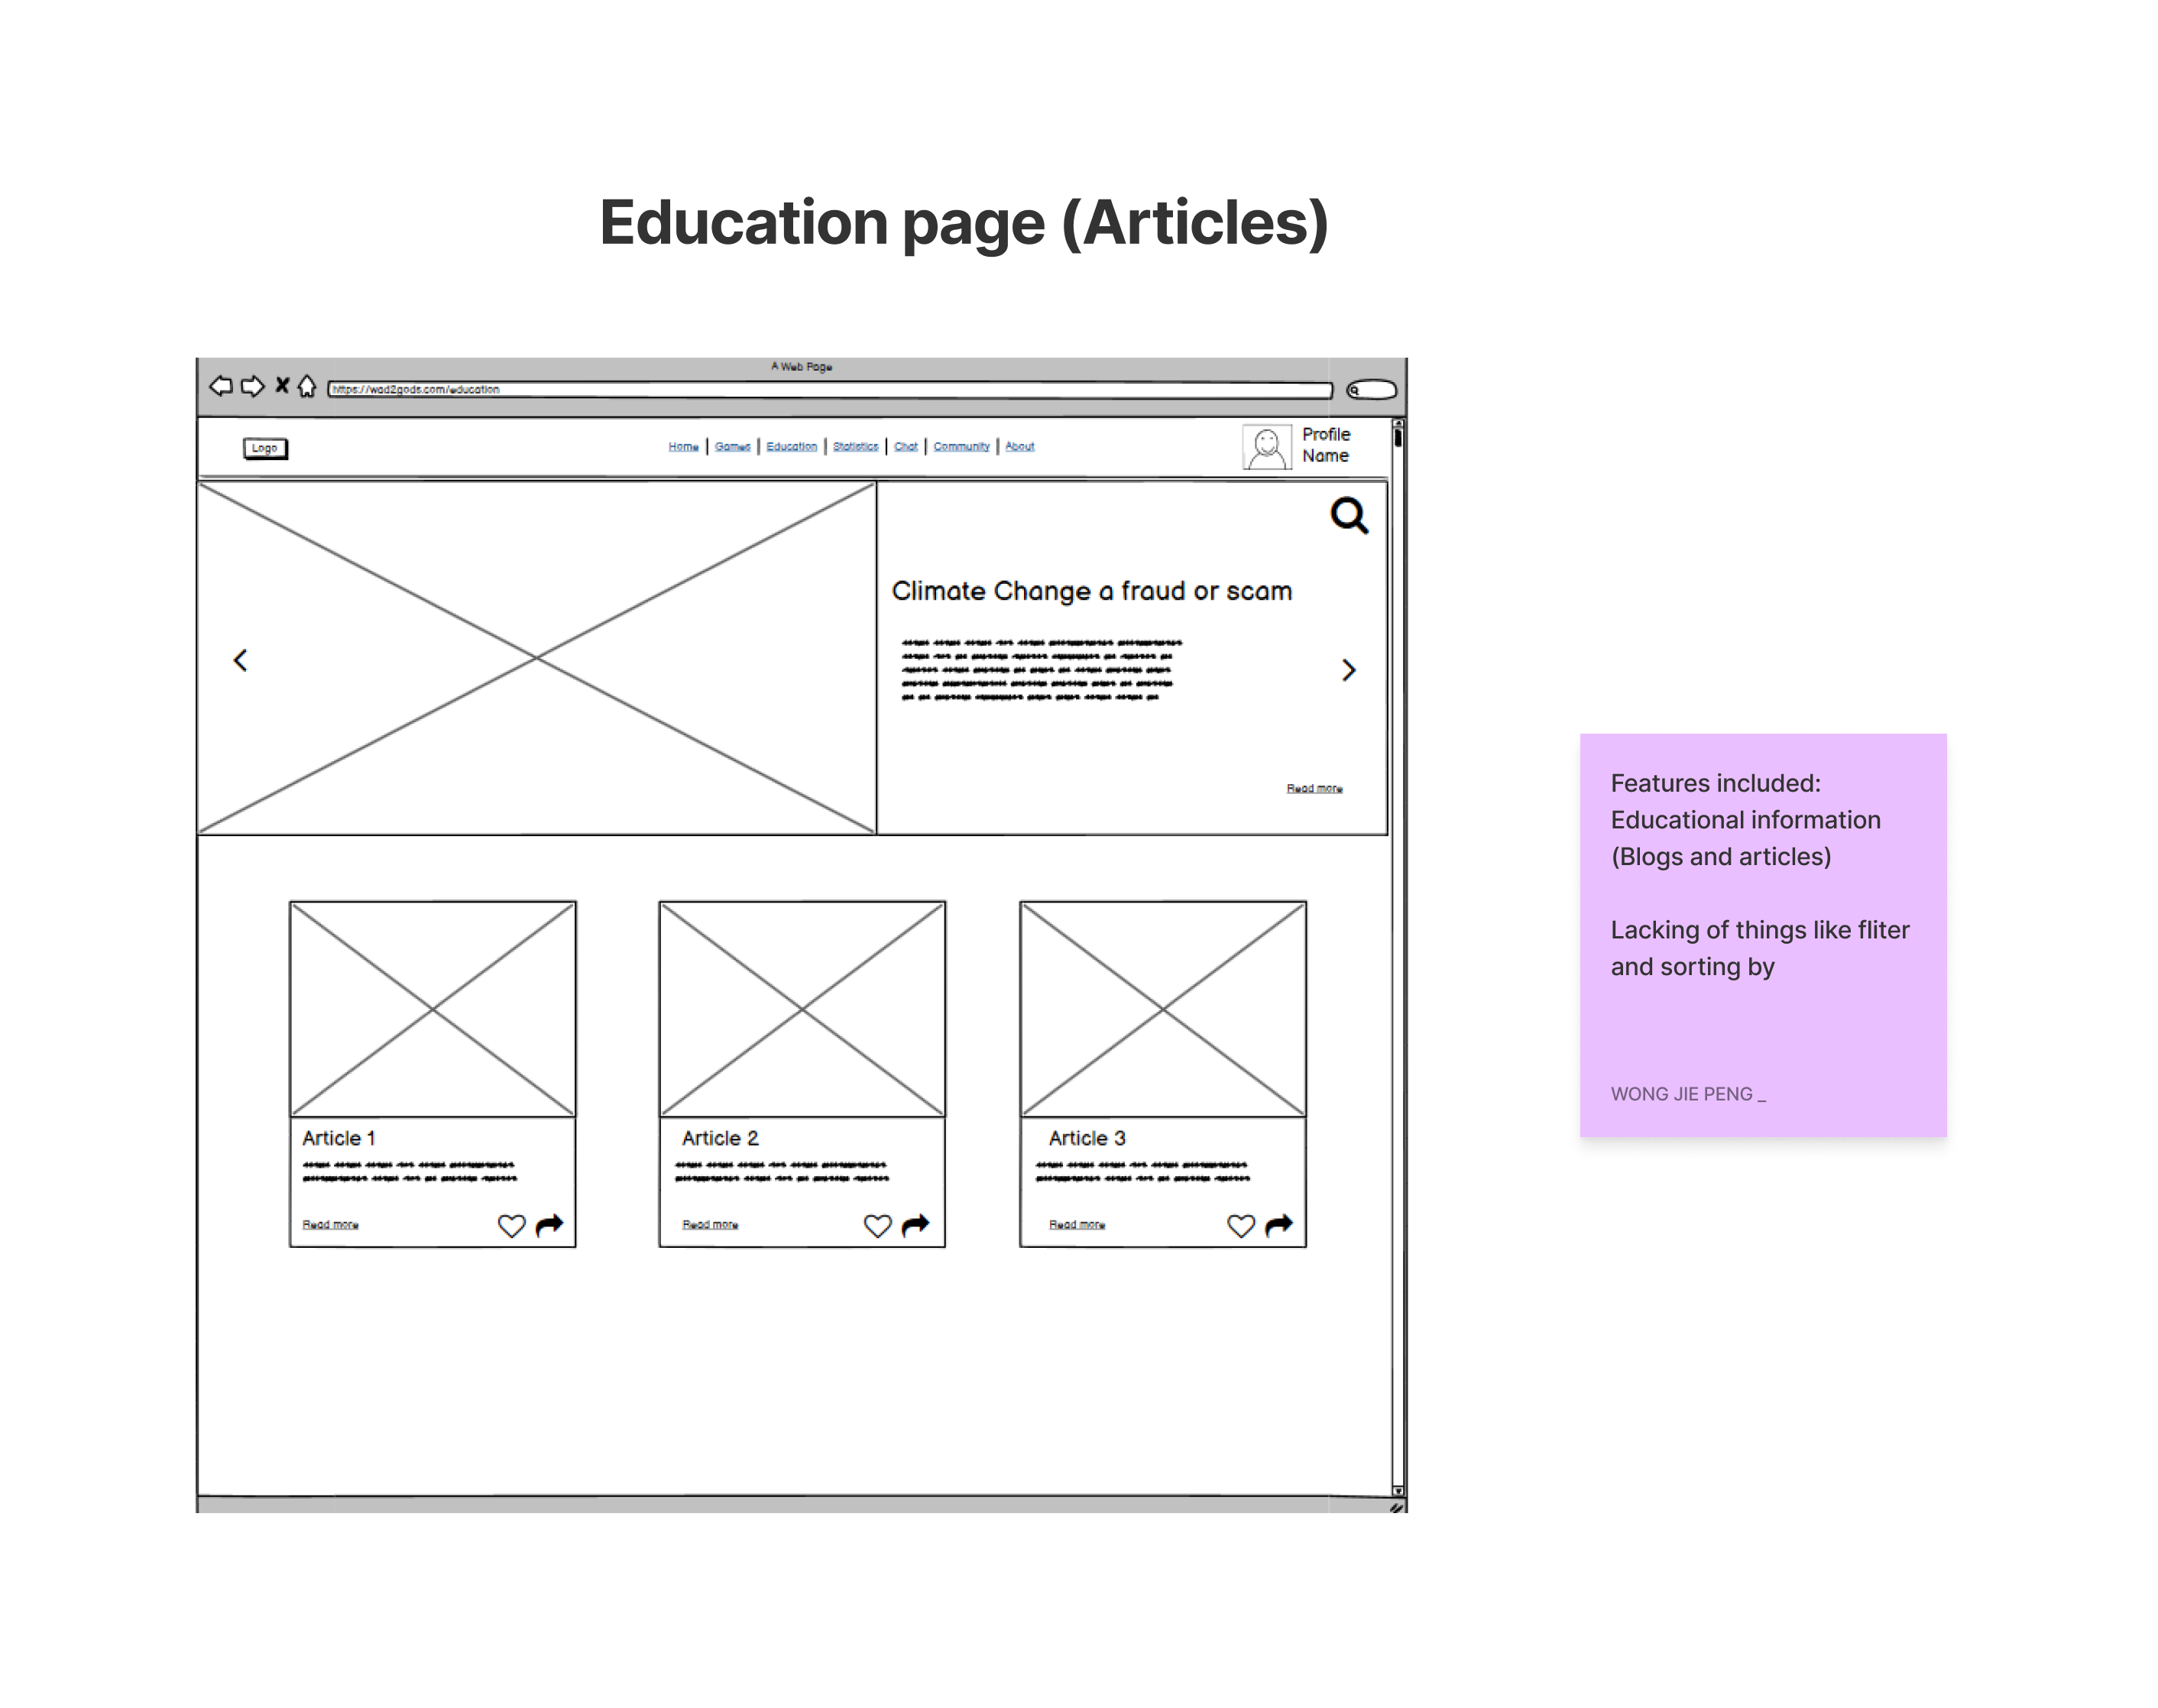
Mockup of the Article/News Page on FIGJAM Whiteboards
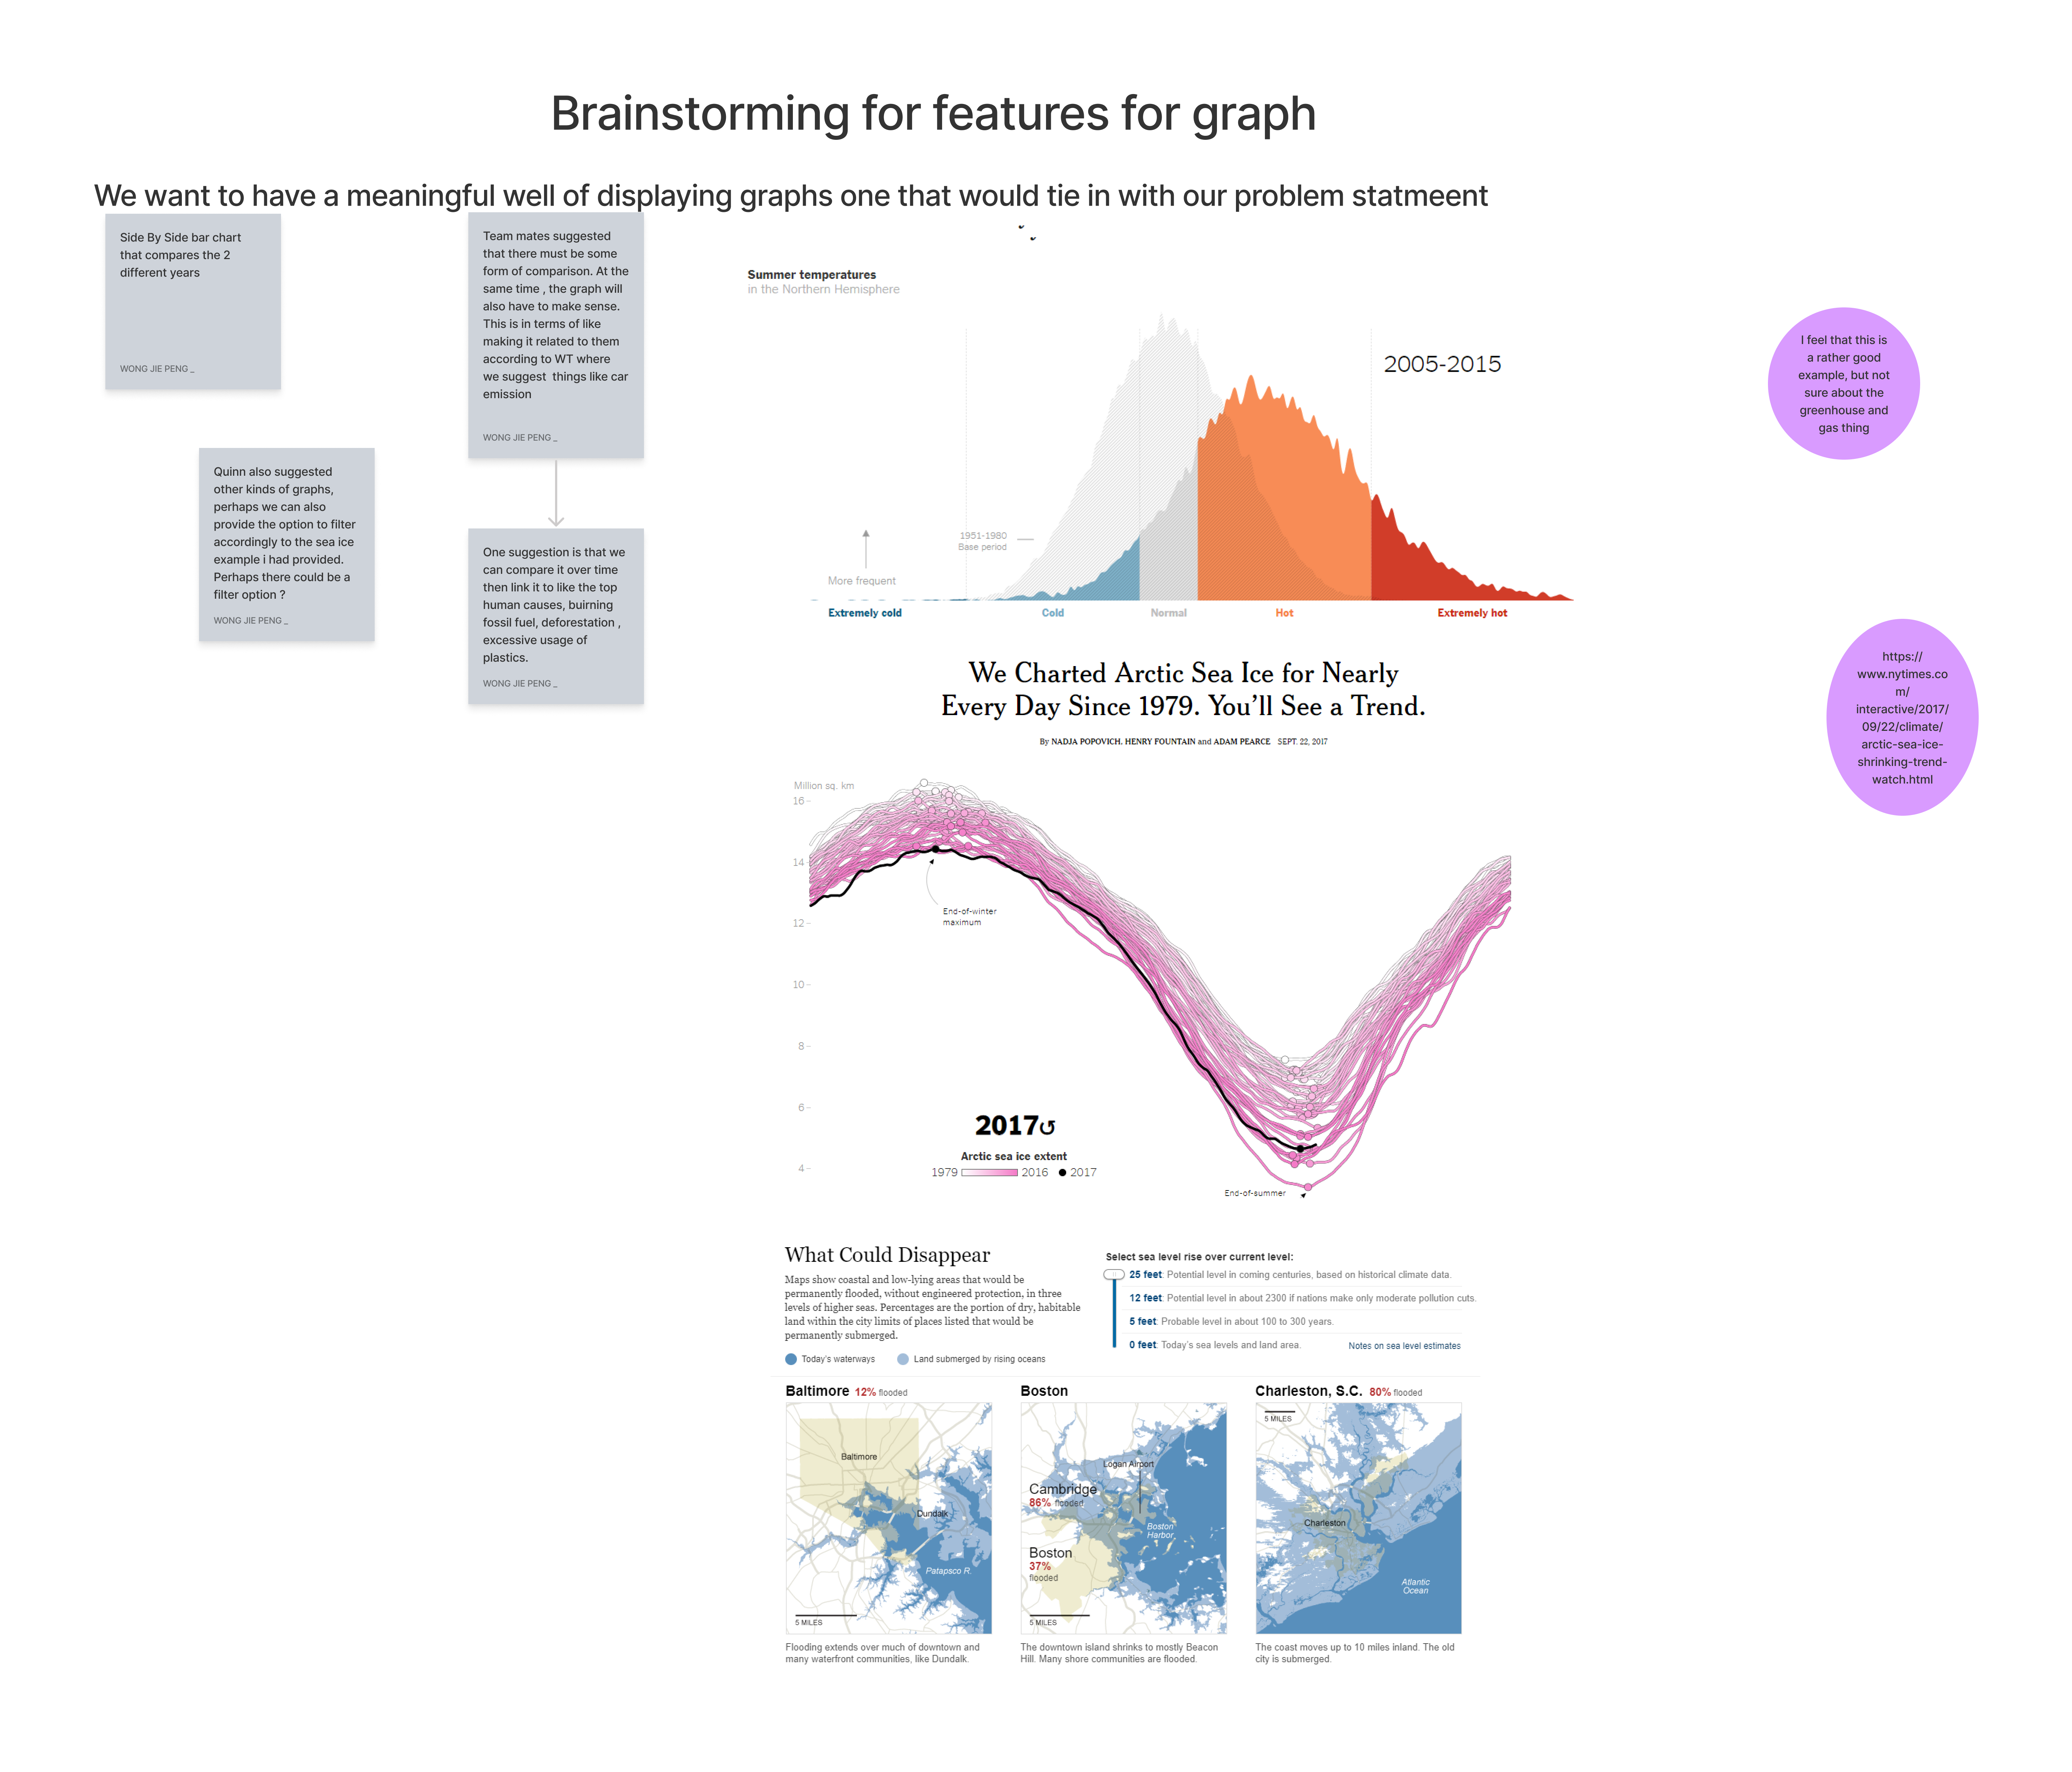
Graph Inspiration on FIGJAM Whiteboards
These prototypes served as an iterative base for us, and we continued to develop them through Figma Design Files. Note that this was not all done synchronously, as some of us had already started on the codebase. Some designs were removed closer to the end of the course. However, most of them provided a good base for us to work on.
I’ve attached the Figma Prototyping File below, so you can take a look at how we designed our initial screens.
Technical Architecture
Now we move on to the technical architecture and design. We started coding in parallel with our Prototyping Phase as we were very short on time. The Technology Stack was built with a few key ideas in mind. First, it had to be simple such that the entire team could pick it up easily. Second, we had to fulfill some in-course Criteria by using a few more advanced concepts of frameworks.
We settled on Github for Version Control as many of us were familiar with it. As we learned both Vanilla Javascript and VueJS (Options API), I opted to use Vue. Even though the framework was not taught until the later weeks, I felt that Vue’s Reactivity System and Single-File Components (SFC) gave us much more power compared to Vanilla Javascript. We went ahead with using the Vue-CLI with Airbnb Styles.
Vue-CLI allowed us to set up everything from Linters to Vuex (Centralised State Management) and Routers. This would come in handy if we ever needed them. We also used the SCSS framework on top of Bootstrap. SCSS provides a very clean way of decoupling CSS and making it reusable through placeholders and mixins. For Bootstrap, we focused mainly on Utility Classes because I felt that using the main Bootstrap Components would be obstructive.
Because we used Vue-Cli together with Node Modules, we were able to leverage the plethora of Open Source Libraries. This greatly sped up our development and allowed us to use advanced libraries to beautify our application.
Next, we also had to implement a data store for the application, and we chose to go with** Firebase**. Firebase is extremely lightweight and does not require spinning up an individual server. Even though it did not provide the same level of granular control compared to other NoSQL DBs such as MongoDB, it did the trick for us.
I setup a simple CICD Pipeline using Netlify, such that we good easily code, deploy and test our application. It nicely follows the Principles of the Agile Methodology.
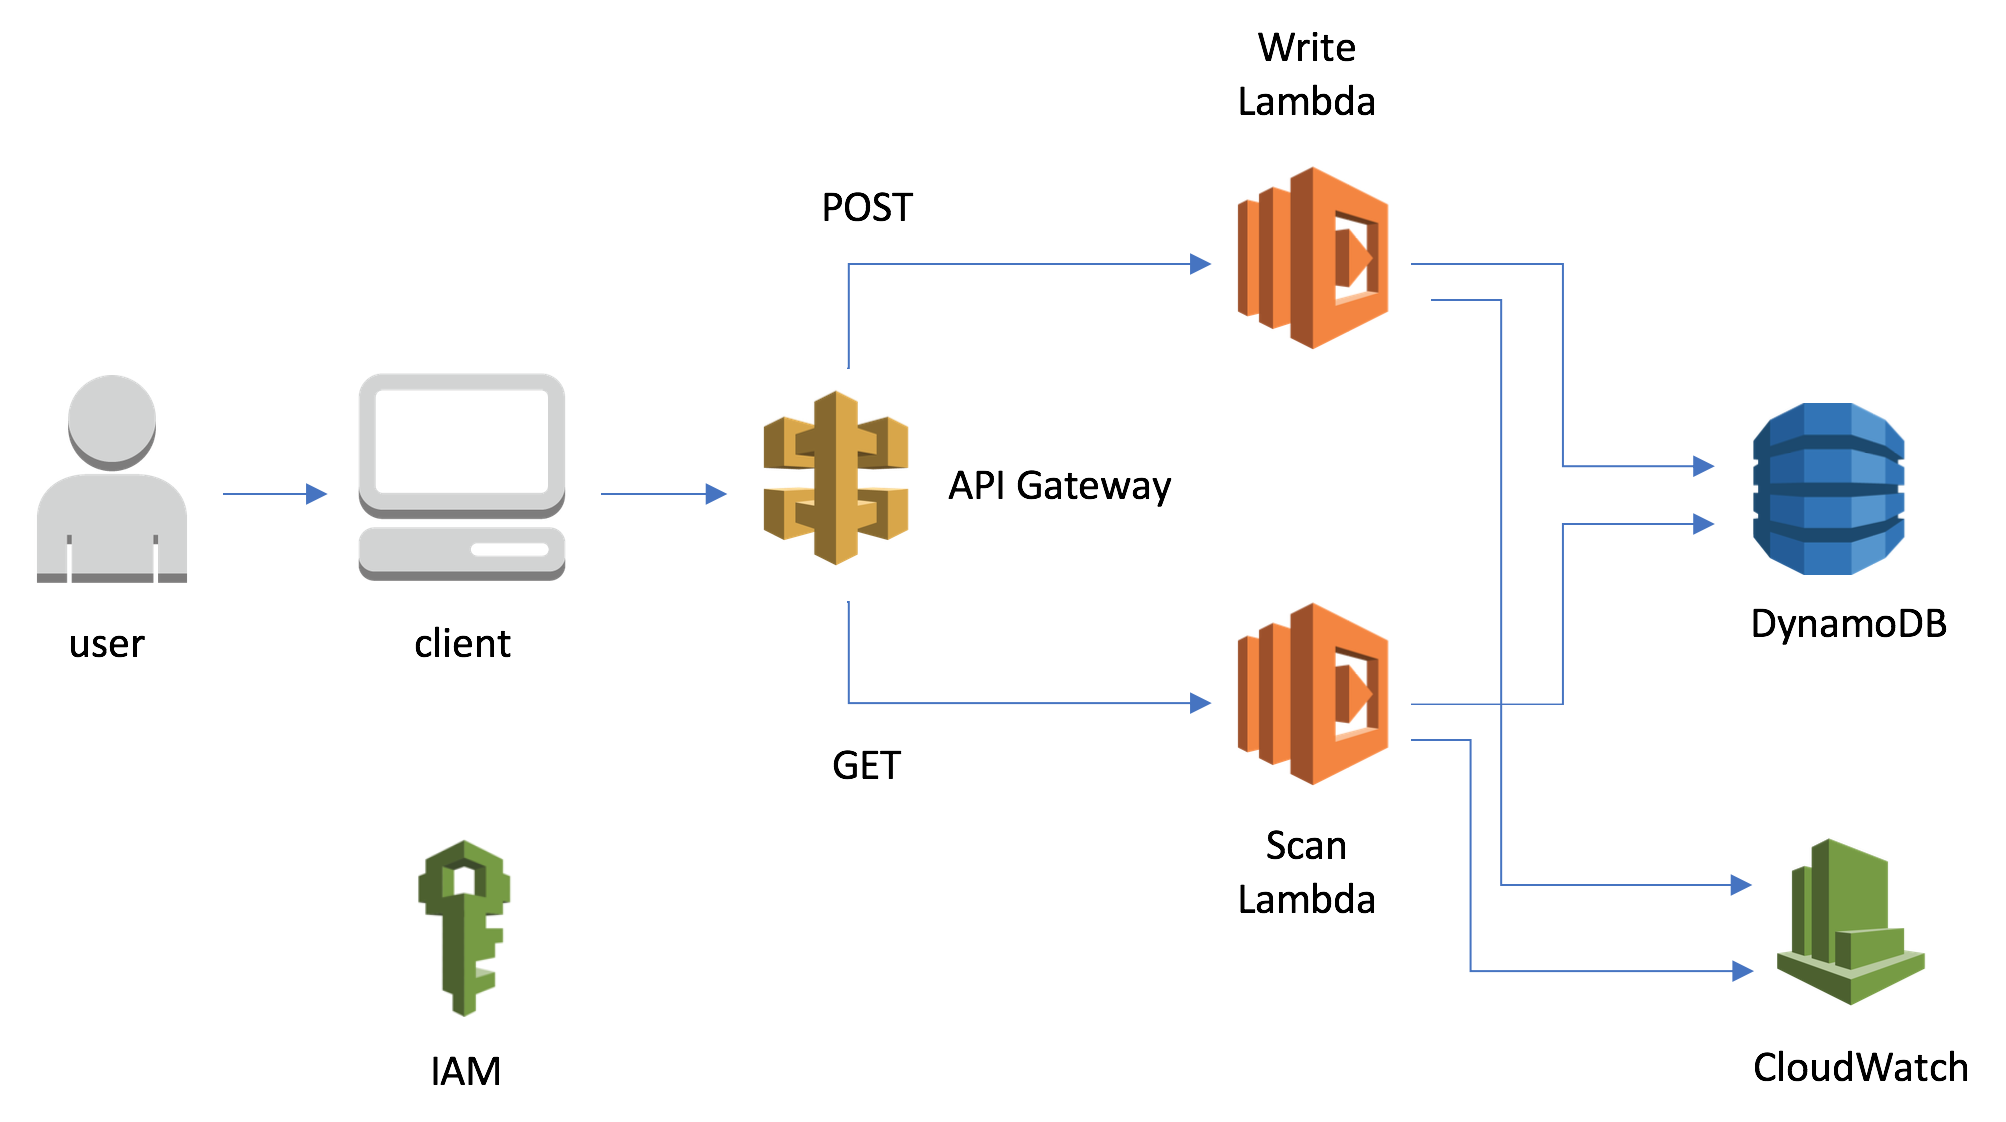
Lastly, we used a total of 4 Open Source APIS and 1 API from AWS API Gateway. The APIS will be covered in more detail in Part 3 as one of the many challenges we faced was picking strong APIs, and connecting them to our application. We had to use reverse Geolocation APIs and I even had to set up an AWS API Gateway x Lambda Integration to overcome some Networking bugs.
Site Endnotes and Future Improvements
We spent a lot of time making sure that the site was fully responsive, and we did the appropriate error handling for edge cases and fallbacks. If we could redo the project there would be a few things that I would do differently
- Account for responsiveness on multiple browsers instead of just Google Chrome.
- Use Linting, .editorConfig and .prettierrc files more cohesively.
- Explore the creation of Progressive Web Applications.
That’s all for Part 2. I try to keep my post short as I don’t like to beat around the bush. Look forward to Part 3.